Fabricating a 50x50mm 3mm wall RHS support for the front chassis rails / radiator support.
Rolled sections of 3mm steel.
Saturday, May 28, 2011
Subframe Connectors
I decided to go with 50x75mm RHS bar through the floor for the subframe connectors. This shot shows where the floor is cut to allow the bar to slide into the rear chassis rails.
The rear frame rail opened up, cleaned out, holes drilled for plug welds, and rust proofed.
Plasma cut 3mm plate for the torsion bar crossmember mount. This design reinforces the torsion bar anchor as well.
The bar needs to be narrowed to fit into the rear chassis rails...
...as well as have an angle added as E Body rear rails aren't parallel with the chassis.
The joins were beveled, welded right through, then ground smooth.
The finished connector, rustproofed and ready to go in.
All welded up.
The rear frame rail opened up, cleaned out, holes drilled for plug welds, and rust proofed.
Plasma cut 3mm plate for the torsion bar crossmember mount. This design reinforces the torsion bar anchor as well.
The bar needs to be narrowed to fit into the rear chassis rails...
...as well as have an angle added as E Body rear rails aren't parallel with the chassis.
The joins were beveled, welded right through, then ground smooth.
The finished connector, rustproofed and ready to go in.
All welded up.
Monday, May 23, 2011
Saturday, May 14, 2011
Cut the old rusty trunk floor out...
One of the patches.
All welded up!
Just starting the stitch welding of the seams. Lots of work getting rid of all the old sealer and crap, in order to get a good weld. I plan to stitch the whole body together, as part of the reinforcing work I'm doing to the car. Nearly everything short of a roll cage!
One of the patches.
All welded up!
Just starting the stitch welding of the seams. Lots of work getting rid of all the old sealer and crap, in order to get a good weld. I plan to stitch the whole body together, as part of the reinforcing work I'm doing to the car. Nearly everything short of a roll cage!
Tuesday, May 10, 2011
colours of the cuda...
Here's a close up shot where I've sanded the body back to show the various paint jobs the car has had over its life. On the left is bare steel, and to the right you can see the different layers of paint. First is red primer, then its factory shade of FY1 Lemon Twist yellow. Then over the years it got painted (with grey primer in between each) black, then white, then purple, and then the black that I added soon after I bought the car... A rainbow of history!
Tuesday, May 3, 2011
Workspace
360ยบ view of the big studio at Weta Workshop where I am fortunate enough to have a little space for working on the kuda. I've blurred out any Top Secret stuff, so you can stop searching for hobbits! There's probably a bunch of ninjas in the shot though...
Saturday, April 30, 2011
Wednesday, April 27, 2011
some work so far
Sandblasting in the garage. Did a few full loads of sand through the blaster, it took ages to collect and sift the sand, worked out it would take too long to do the whole front clip. Got a great price from a local blasters, so got them to do it.
The kuda trailer, ready to go to the bodyshop to get the front straightened out and some new steel put in.
On the autorobot. New inner fenders and left hand chassis rail. The whole front was shunted over, and twisted. They de-stitched the cowl and patched the rust in that area too. Now I've something to aim for with my repairs.
At Weta Workshop in our studio. This is where a bunch of miniatures for Lord of the Rings were built, as well as a great deal of other exciting projects.
Starting the rust repairs. Spoiled with machines nearby, plasma-cam, roller, folder, drill press, etc... Cheers Weta!
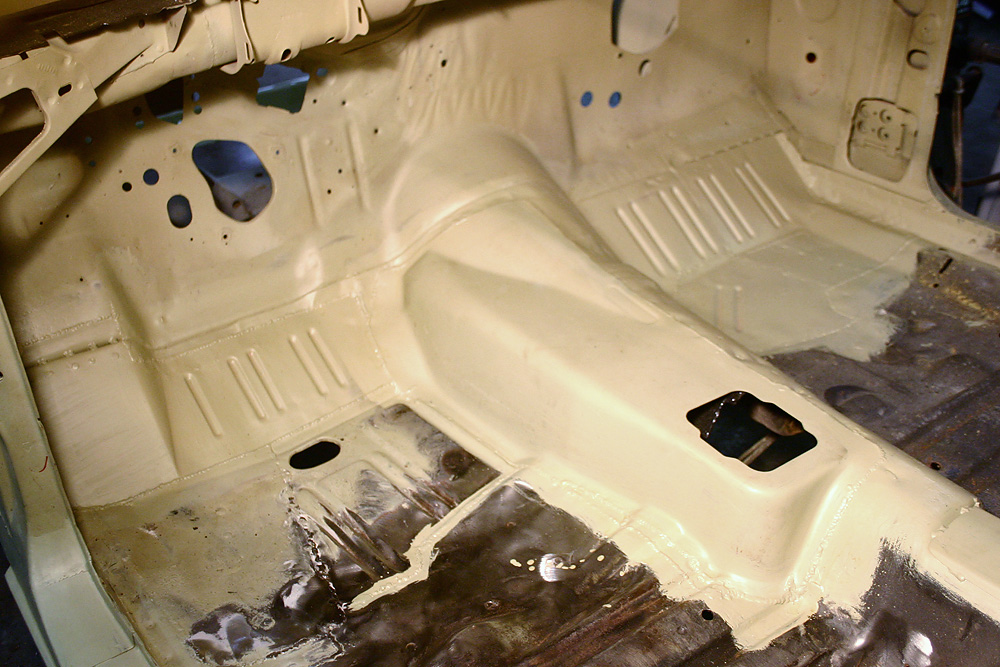
Passenger footwell. I made patch templates in cardboard, then scanned and redrew them on the computer as vector files.
Which I then cut on the Plasma cutter.
I decided to try pressing the swages in. So I cut a couple of templates and a die. It worked pretty well, but as I was only clamping a relatively small area around the swage, the metal warped and buckled quite a bit and needed a decent massage before being ready to weld in.
The kuda trailer, ready to go to the bodyshop to get the front straightened out and some new steel put in.
On the autorobot. New inner fenders and left hand chassis rail. The whole front was shunted over, and twisted. They de-stitched the cowl and patched the rust in that area too. Now I've something to aim for with my repairs.
At Weta Workshop in our studio. This is where a bunch of miniatures for Lord of the Rings were built, as well as a great deal of other exciting projects.
Starting the rust repairs. Spoiled with machines nearby, plasma-cam, roller, folder, drill press, etc... Cheers Weta!
Passenger footwell. I made patch templates in cardboard, then scanned and redrew them on the computer as vector files.
Which I then cut on the Plasma cutter.
I decided to try pressing the swages in. So I cut a couple of templates and a die. It worked pretty well, but as I was only clamping a relatively small area around the swage, the metal warped and buckled quite a bit and needed a decent massage before being ready to weld in.
Tuesday, March 8, 2011
Wednesday, February 9, 2011
Wednesday, January 19, 2011
Wednesday, November 10, 2010

this rad illustration of the kuda is by none other than the brutally talented christian pearce, a good friend, coworker, and fellow car nerd. although even he is sick of hearing about the kuda...
this image was originally created as part of pearce's awesome 99 deadly sleds project, check it out here
Monday, November 8, 2010
KUDA photography
Subscribe to:
Posts (Atom)