Sunday, December 11, 2011

Steering Quickener


Working out how to mount the 1.5:1 steering quickener.

Once I'd worked out the design I plasma cut it out of 3mm steel.

Here's the finished result. Fits perfectly and is very rigid.

Bolted in place with the steering quickener.

Should work great. Next up are the seat brackets.

Thursday, December 8, 2011

Seems like not much has happened on the cuda lately, not much blog worthy stuff anyway. But here's a few random pics from the last couple of weeks:

Mocking up the steering column, steering wheel, pedals, seats etc to work out the seat brackets and steering quickener.

Fabricated an alloy shroud for the fans, and just starting the wiring of the run stand.

Finished lower control arms. Reinforced, sway bar brackets added, powdercoated, with Firm Feel heavy duty greasable pins and nylon bushings.

Lots of fun to spin the shell around.

Tuesday, November 22, 2011

Made an exhaust/muffler system for the engine/cam break-in on the stand. You void the warranty on TTI headers if you run them on break-in (as the ceramic coating needs to heat cycle before being fully set, and the exhaust gets too hot during the break-in), so I blasted a pair of old log manifolds and used the old mufflers off my car.

Friday, November 11, 2011

Garage

I've tidied up my garage so I can finish the car there, Weta Workshop is currently too packed with orcs and robots to fit an old muscle car back in.

Here's a before photo of the garage during the tear down of the car.

Saturday, November 5, 2011

Coming together...  Parts back from powdercoaters, suspension mockup, valve cover modification, custom fitted plug leads.

Hotchkis upper control arms, strut rods, tie rod, sway bar. Firm feel heavy duty lower control arm pin and nylon bushing. Magnum Force 2" drop spindle. Reinforced lower control arm and K member. Should be fun to thrash!

I had to modify one of the valve covers to make room for the headers. My first alloy TIG project, and it didn't turn out too bad. Alloy sure is trickier than steel.

Friday, October 28, 2011

Something Fishy

Here's what I'm thinking for a future colour scheme for the car. The body is all flat black apart from the rear quarter, door, and c pillar on one side, which will be painted to look like a rough old race car (inspired by the 15oz coupe). I love the idea of having a two sided car. Here's a link to some side views.

Friday, October 21, 2011

Little details

Made a little bracket for the dipstick, this sort of thing is fun to do. I'm also happy with the plug lead routing, I made brackets that hold the two rear most leads on either side right up tight to the block. The leads clear the overkill headers nicely, and I'll be running heat shields where the leads are between block and header tube.

Tuesday, October 18, 2011

Monday, October 17, 2011

Rollbar

Welded up the rollbar, a most enjoyable day at work!


Such pretty colours!

Not bad for my first TIG welding project.

It even fits, bonus!

Sunday, October 16, 2011

Modifying the intake. Here's the stock Edelbrock Performer RPM dual-plane intake.

The heads in my 440 have been quite heavily ported. The gasket here has been trimmed to the head port size, quite a bit larger than the stock ports on the intake!

After opening up the runners I lightly sandblasted the ports to give them a slightly rough texture, as this helps fuel mixing, intake runners shouldn't be polished apparently.

I also did a bit of work to the carb pad, as it had some ledges and a blunt divider that were an issue with the Wilson 1" 4 hole blended spacer between the intake and carb.

I cut the coil mounting castings off the front of the intake, as I'm not running the coil there. Then gave it a coat of black enamel to match the motor.

Done. I've also been working out the mounting bracket for the fuel pressure regulator, as well as the plug lead routing and the fuel line plumbing.

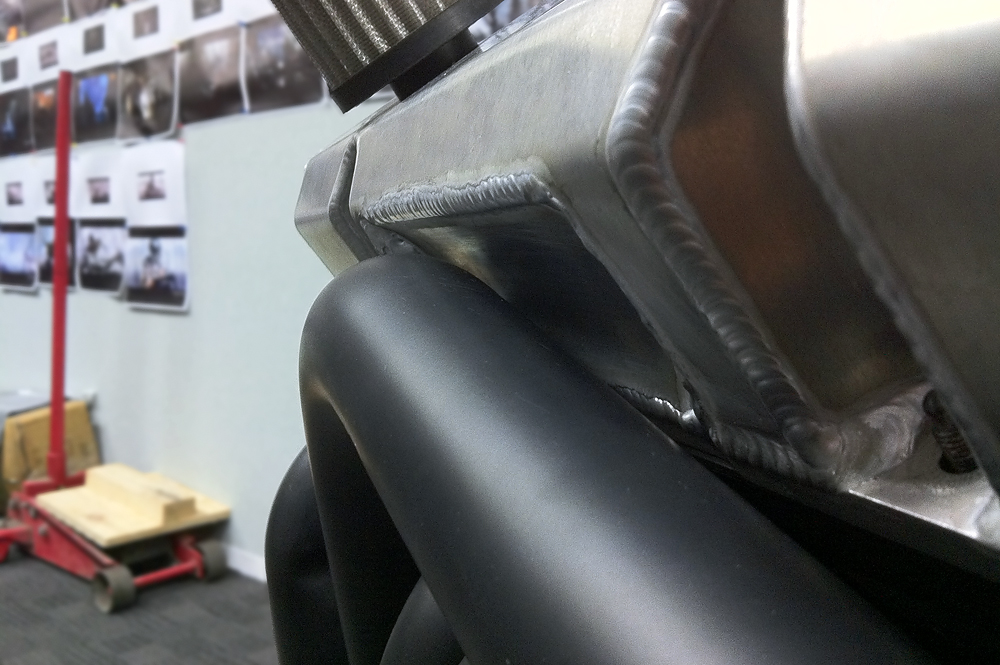
I got my TIG welding to the point where I'm confident welding up the half cage/roll bar. TIG welding is such a great process, I love it.

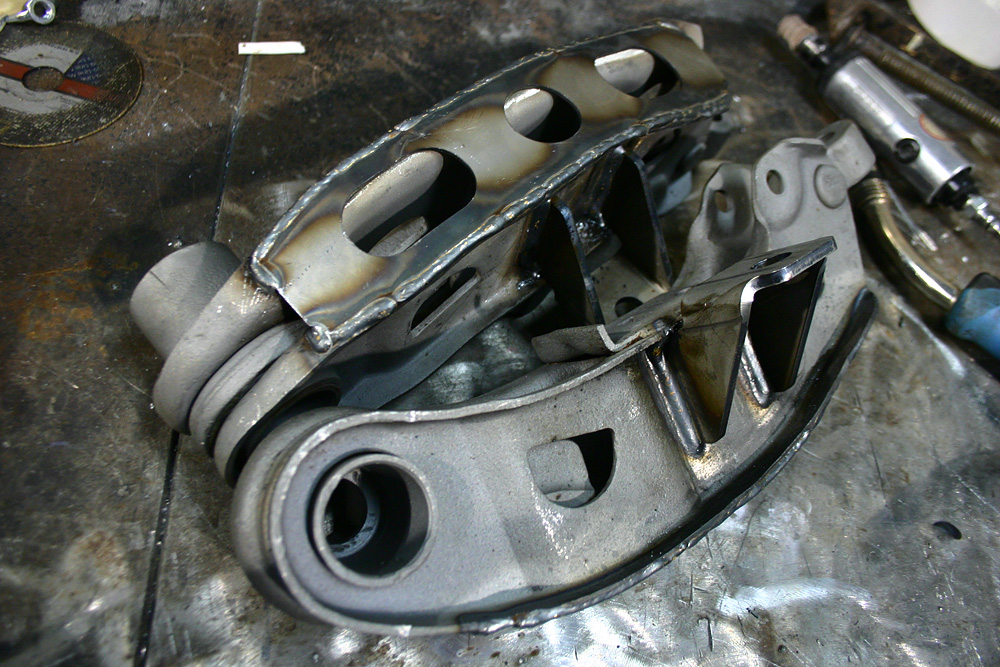
Here's one of the backstay mounting plates.

Friday, October 7, 2011

Concept image of the Kuda. Here's the original photo.

Thursday, October 6, 2011

Engine run stand

Finished fabricating the drivetrain dolley / engine run stand. Now to finish the motor, wire it up, and run it in! Big thanks to Weta for putting up with this in the hallway!

Monday, October 3, 2011

Working on the drivetrain dolly. The K member bolts on via the sway bar mounts, and the engine, bellhousing, and gearbox fit up so you can wheel the whole assembly around easily. The nose of the car can be dropped over this unit to install the whole drivetrain as one, as the factory did. I have also built a separate frame that bolts to the front that mounts the radiator, along with the battery, fuel can, and gauges etc so the engine can be broken in on the dolly. Great to see the whole drivetrain together too, it looks fantastic!


Wednesday, September 28, 2011

Concept image of the Kuda with the fiberglass hood off. The hood will be secured via four Aerocatch fasteners, and I'll be putting two extra pins on the rear edge of the roof, in order to latch the hood as shown when it's removed from the front.

Aerocatch fasteners. Pretty cool little things, very well engineered.

Lower Control Arms

Reinforcing the lower control arms. First up they got stripped of bushings and bump stops, then sand blasted clean.

Reinforcing plates from Firm Feel were welded on the underside.

As my car never came with a front sway bar, I had to weld on the required brackets.

Done. Ready to be cleaned and powder coated.

Sunday, September 25, 2011

Test fitting the K member on the motor.

Saturday, September 24, 2011

Test fitting the new fiberglass fenders and hood along with the new wheels and tires. The fenders fit better than I was expecting from race-weight fiberglass parts. Nice to see the cuda looking more like a car too.

Thursday, September 22, 2011

Kuda components

Saturday, September 17, 2011

Installing the new Milodon road race oil pan, a very nice part.

Windage tray and pickup.


Reinforcing the factory K member. The skid plate will be welded in after I test fit the big tubular sway bar that has to fit under.

I welded all the seams (twice) and rewelded the factory welds (some of which were incredibly shabby, but that goes for the rest of the car too). I also added a Firm Feel gusseting kit.

It's always nice to weld new steel to clean metal. Welding the seam wasn't as nice due to all the oily crap between the metal which makes for shitty looking welds (the oily crap you can see here is just anti weld-spatter spray though, I sandblasted and ground the K member as clean as I could before I started welding).