While the cuda is in a running state, and before I pull it apart and finish the body and paint, I decided it would be a good time to mockup and test the modified steering, braking, and suspension setups that weren't on the car for the initial shakedown. So I've been working lately on getting those things ready for another little shakedown run. This image isn't really showing any of that, instead it just shows a rough cardboard rear spoiler mockup, but it makes for a nice first image! The final spoiler will be made out of alloy with the little braces and bits riveted together. I really like the little led brake light and empty tail lights, looks rad!

This is the new hydroboost unit and its accompanying master cylinder. This unit uses power steering pressure to boost the brakes, as opposed to engine vacuum. These things are a hit on the pro touring scene and give you good power and better reliability apparently, and also let you run a big cam without worrying about lack of brake boosting at idle or low rpm. I
am thinking of replacing the hydraulic lifter cam in the motor with a big solid cam...
As I'm running hydroboost and a steering quickener I thought it would be a good idea to have a power steering fluid cooler in the mix to make everything happier when it's being thrashed. I made this alloy bracket to mount the cooler in the engine bay.
Here's the cooler in place roughly where the battery used to go. It's plumbed into the return line from the steering box, with a Y junction just after it and before the reservoir tank, with the other inlet on the Y taking the return line from the hydroboost unit. The cooler will have fresh air ducted to it from a
NACA duct in the hood.
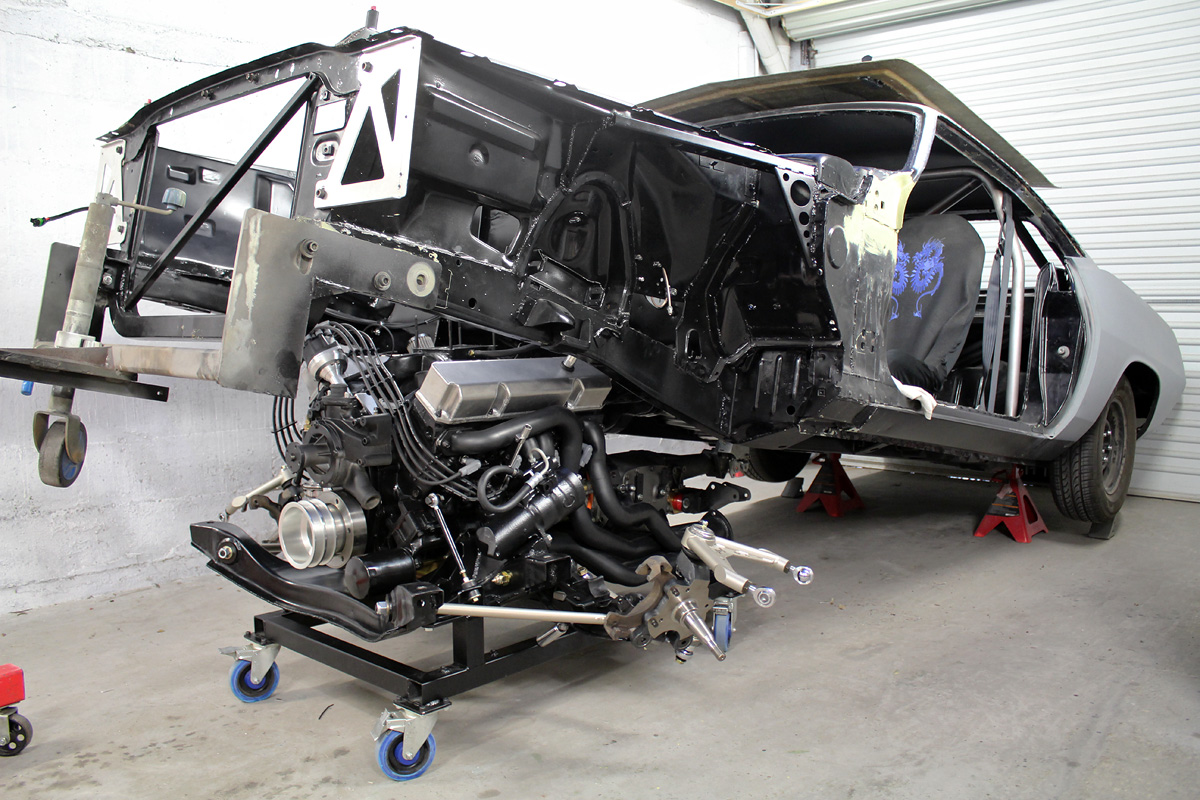
This shot shows the whole setup, with the KRC pump, hydroboost unit, cooler, and braided stainless high pressure lines. I love the no-nonsense industrial/racecar look!
I've also added a Moroso air-oil separator into the PCV vacuum line to catch excess oily mess before it goes into the intake manifold.
And I've added this nice little alloy radiator overflow tank.
All together I think the engine bay is looking fantastic. I love it!
The new Mcleod Racing clutch I've got has a different pressure plate finger ratio from stock, so I needed a pedal stop to limit the travel of the clutch pedal. The factory ratio is 6:1 and the new plate is 4.8:1 I believe, so it's a wicked short pedal throw.
The stop bolted in place. Feels nice and solid and you can really stomp on the pedal, without fear of bending the pressure plate fingers or damaging the Z bar clutch linkage. The 10mm nut I had previously welded onto the firewall for just such a purpose came in very handy for mounting the stop!

Here's one of the new 11.75" 'cop' rotors with 3" long Moroso wheel studs. I have Firm Feel race pads for the factory calipers and the rear drums and that along with the hydroboost, adjustable proportioning valve, line locker, and cooling ducting, are the extent of the brake modifications I'm doing at this stage on the car. I'm unsure as to whether I'm sticking with 15" wheels and tires or going to 18" so I don't want to go all out and stuff the baddest brakes I can into the 15" wheels only to have to replace it all if I go to 18"s. I want to keep the 15"s as they match the tough old school look I'm going for on the car, but they are heavy and won't handle as well as modern 18" setups, so if they end up being too much of a limiting factor then I'll go to 18". And then of course fit the biggest brakes I can inside them. So the setup above is just the bare minimum for now, and should give good performance on the street, while lacking a bit on the track.

I'm running the rear brakes for this second shakedown run, and have temporarily plumbed the line and the line locker inside the back seat area. There's an illuminated rocker switch controlling the line locker, which is just there for testing purposes and not for doing wicked mean skids honest!
I've also installed the modified column with the 1.5:1 Coleman Racing steering quickener grafted in. I can't wait to see how this feels! The
Hotchkis E-Max has a similar setup and apparently has "magical steering", so it should feel pretty good! The factory steering is slow and
way too over assisted with no road feel at all, and rack and pinion conversions have too many drawbacks, so a setup like the above gives heavier faster steering with more road feel. Just the ticket!
While I love the factory pistol grip Hurst shifter and will be running one with custom carved wooden grips in the finished car, I also have a soft spot for the classic Hurst white ball. So I bought one and made a quick custom handle for it, just for this shakedown run. Looks rad in the stripped black and gray interior!