Monday, April 29, 2013
Wednesday, April 24, 2013
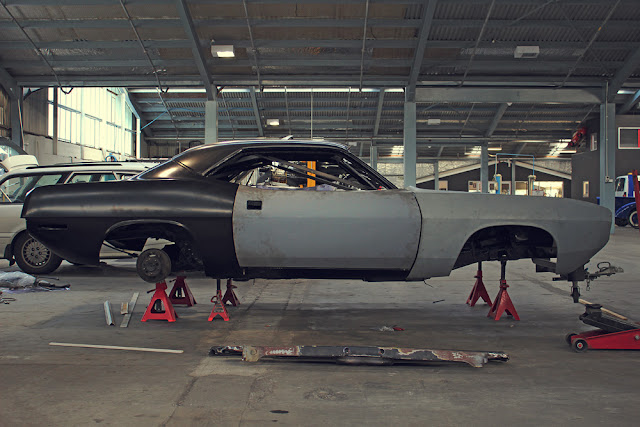
'Cuda at Junior's
I was feeling a bit out of my depth fitting all the new panels and trying to work out where to start and what to start with. Nothing fits perfect and pretty much everything will need tweaking to get the best result. Fortunately Junior and his rad team at Junior's Kustoms Rides have very generously allowed me to clutter up a corner of their amazing workshop with my old cuda and let me work on it there. There's some talented folks around, and I hope to be able to pick their brains and achieve a much better result than muddling along on my own in a cramped garage. Plus it's pretty inspiring to be able to check out the seriously badass builds there. Huge thanks to Mark and the crew!
Thursday, April 18, 2013
Test fits
Everything seems to roughly fit pretty well, but holy shit it's going to be lot of work to get everything straight and even!
Hinge rebuild
Sunday, April 14, 2013
iron oxide exorcism
I've patched up the rusty bits that the sandblasting exposed. The upper door hinge/A-pillar sections on both sides needed to be repaired, there was quite a bit of rust between the layers of steel. Here's an image showing the repair of one side. There were a couple other little sections to repair on the body too, but that's pretty much it! Rust be gone.
Wednesday, April 10, 2013
Painting Timelapse
Here's a little timelapse video I shot while painting the car yesterday. I put 4 coats of paint on (only one coat shown in the video, the first black top coat going over the grey DP40 primer sealer), and it took all day! Huge thanks to Dave at Classic Panel and Paint in Newlands for allowing me to use his booth.
Sunday, April 7, 2013
Seam sealed
Urethane seam sealed the various seams, welds, and repairs, inside and out. Not a very fun job! But vital for long term rust prevention.
I made a little hose extension for my caulking gun so I could seal the inner seam where the cowl meets the firewall. Worked beautifully and I got a great seal along the whole length of this tricky area.
I made a little hose extension for my caulking gun so I could seal the inner seam where the cowl meets the firewall. Worked beautifully and I got a great seal along the whole length of this tricky area.
Wednesday, April 3, 2013
Sandblasting and painting and sanding and sealing
Here's the car as it looked yesterday morning, strapped to a truck, on it's way to the sandblasters.
The weather wasn't looking good, despite the forecast being the opposite.
Getting the fresh coat of primer I put on blasted off to silvery metal that paint will stick to like nothing else. I think the blasters appreciated the rotisserie.
The blasting ate through a few places where invisible rust had been eating away in layered sections. So looks like a few more little rust repairs to do, just when you thought you had got em all!
As the weather was looking shit, I painted a thorough coat of epoxy urethane primer on the shell at the blasters. Cheers to Matt and his rad team at Steam and Sand for use of the space and letting me close up after hours when I had eventually finished!
This morning it was trucked to Classic Panel and Paint in Newlands so I could use Dave's booth to paint it (cheers Dave!), but sanding the shell took half the day (you have to sand the primer if it sits for longer than 8 hours without being overcoated). That sucked. And seam sealing all the joins and lap welds isn't much fun either...
Some of the paint needed to paint a car... You need a fair bit more than this too. Don't ask how much this shit costs!
Subscribe to:
Comments (Atom)


