Saturday, August 25, 2012

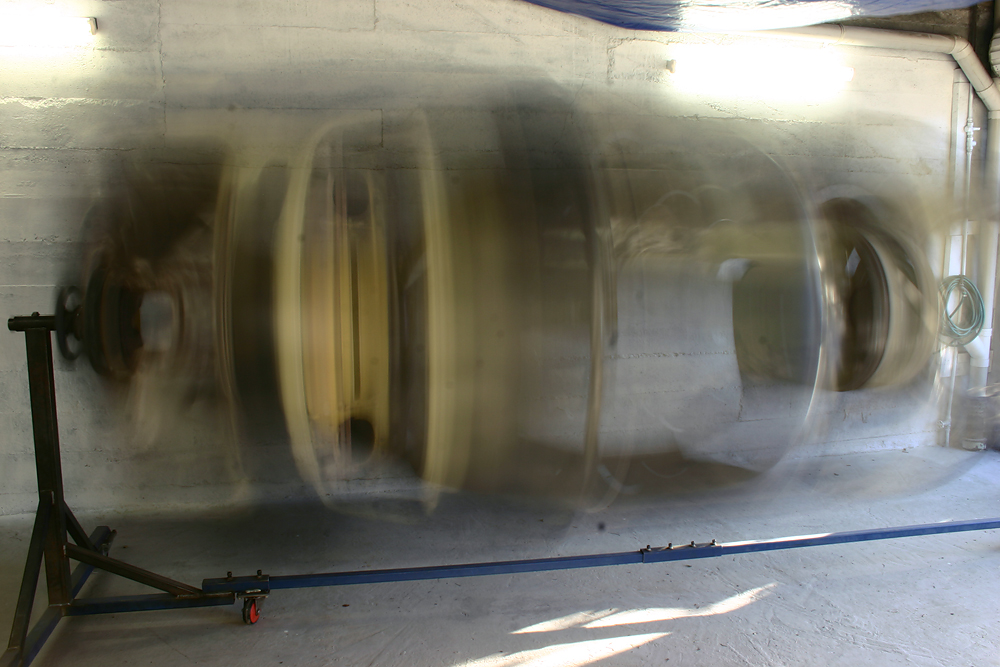
Turned the car back into a trailer today, so it's ready to go back to the workshop for the exhaust fabrication. I'm also mocking up the whole rear suspension with the 1" spring relocation and the Hotchkis sway bar, so I can route the 3" pipes nicely round everything.

I like the collection of surfaces and finishes in this photo, but I'm looking forward to this all being blasted clean and painted black. If I build a rat rod someday, a good look would be this stitch-weld-burned green primer and bare steel with black patches. With a bright orange motor like the one below.
Some of the aesthetic stages the motor went through. This is what happens when a designer has a motor sitting next to his desk!

Friday, August 17, 2012

Gratuitous 440ci motor porn

This thing is looking so good sitting next to my desk I think I'll miss it when it's in the car. New Holley Ultra HP carburetor and KRC racing power steering pump. I'll be fabricating new brackets for the alternator and power steering pump, and I need to modify the new swivel water neck to fit the Milodon high flow thermostat. Hopefully this thing goes as good as it looks, and it sure looks good to me!

Kuda Komponents III


Thursday, August 16, 2012

New stuff

I've pretty much finished the work on the shell now. Lately I've squared up the suspension mounting points, which required some careful measuring and fixing, hence the string as a center line. The car was poorly built from the factory and had some defects from age and accident damage, so I wanted to get it as square as possible while it was in this stage.

To give you an idea of how poorly built these cars are check out these leaf spring hangers. The one on the right is standard (these are Dr Diff 1" relocation hangers, that move the springs in 1" either side, so you can fit larger tires) and the one on the left I've modified to square the spring eye mounting points from side to side. It was easier for me to modify the hangers than it was to try and correct the shoddy factory spring perches (which I stitch welded and added torque boxes to before noticing how misaligned they were). Amazing how different they were, my car must have been built on a Friday...

I added new perches to the diff housing, moving them in 1" either side.

And I also just received my third big shipment of parts from the states. Early xmas!

The big box contained new rear quarters for the car, which seem to fit up very nicely. New sheetmetal is a wonderful thing. There's a new tail panel, deck filler panel, trunk drops, and trunk gutters as well, along with a new roof I purchased a couple years ago.

Now onto the exhaust fabrication!

Thursday, August 2, 2012

Exhaust plans

Here's a quick concept image of the exhaust for the car. This is my next job, and pretty much the last before I'm finished with the shell and can sandblast and paint it. I'll leave the electric cutouts and the side exit pipes till after the car is done. Better start practicing some stainless TIG welding!

Monday, July 2, 2012


Wednesday, June 27, 2012

I think I'll miss this view when it's installed in the car...

Sunday, June 17, 2012

Disturbing the peace. Sorry to my neighbours!
Actually the neighbours seemed to enjoy it, a bunch of parents brought their little kids out to have a look!
If I were to go with shiny paint for the Kuda, it may look something like this. The Hurst logo would probably be replaced with a similar coloured custom logo. Ignore the 4 lug wheels, I couldn't be bothered editing the photo I started with (rays TE37V wheels) to 5 lug...

Sunday, June 3, 2012


Thursday, May 31, 2012

My latest thinking for a future paint job for the car. I love the name Mopar Missile, and it suits the black nose look. The other side is all flat black.

Wednesday, May 30, 2012

I fired up the motor for the first time and broke in the cam, and apart from a leaky rear main seal it went great. I'll fix the leak then see how she sounds with open headers. If I get a chance I'll edit some video I shot of the motor.

Tuesday, May 15, 2012

Oh oh!

Thursday, May 10, 2012

Finished run stand wiring

Finished the wiring for the run stand. Now all that's left is to do the final assembly of the valve train and intake etc, and the motor can be fired for the first time!

Wiring is good fun. I look forward to wiring the whole car. I think...

Thursday, May 3, 2012

A little of the latest work:

Transporting the engine and drivetrain in preparation for the break-in of the motor. The drivetrain dolly I built really makes this sort of thing easy.

Garage buddies.

Welded the clutch Z bar bracket on. Big thanks to Josh for the pics and measurements that helped me get it in the right place.

This is the info plate on the firewall which will have the certification plate, fender tag, and VIN tag on it. I've welded nuts on the other side for easy mounting. The actual final plate will be alloy.

Here's the electrics plate on the inside of the firewall (where the heater box used to be) that will hold the fuses, relays, MSD box, and other electrical stuff. Again I've welded nuts on the other side, and the final plate will be 3mm alloy.

The finished gauge panel for the engine run stand. The two extra gauges on the top right will be going in the car. Doesn't hurt to be able to double check the oil pressure and coolant temperature!

The other side, showing the old mopar ECU from my car and the associated electrical bits that will control the motor on the run stand. Just need to finish the wiring.

The wiring diagram for the run stand. I'm using a couple of handy little HELLA relays for the electric fans, that have built in fuses, instead of the single relay and fuse shown in the diagram. The alternator wiring is also not shown on this diagram.

Tuesday, April 3, 2012

Future Missile

A quick concept image exploring future paint ideas for the car.
Sunday, March 25, 2012

Updated concept image of the engine bay. Added an info plate on the firewall that has the LVV Certification plate, VIN tag, and original fender tag. There's also the KRC racing power steering pump, hydroboost brake booster, and power steering cooler with duct. This duct will seal to the underside of the hood, where a channel will direct air from a NACA duct in the hood (the duct is on the other side as this helped with looks and packaging).

Saturday, March 24, 2012

Seat brackets

Final mockup of the seat brackets. The seat just clears the subframe connector in the floor, and the driving position is good for an E body, with a good range of adjustment. Feels good sitting in there. The final plates will be 5mm alloy.

Friday, March 16, 2012

Lately...

I have been working on the car, but most of it isn't really worth posting on here. Stripping paint, mocking things up, planning, etc...  But here's some work from today:

Added the braces that tie the rollbar into the c-pillar sail-panel area. These bolt on via the upper seat belt mount and an additional 10mm bolt.

Here's the plate welded to the sail panel to reinforce the area. There's a 10mm nut welded to the back for the additional bolt.

The plates on the rollbar are fixed with a bunch of heavy MIG tacks for now. I'll grind these back and TIG the plates on just before the car is done, in case any thing needs to change.

I also added a couple of braces to the firewall to inner-fender-brace area.

I wasn't satisfied with the way the stiff inner fender brace butted into the weaker cowl area. So these plates will help spread the load.

Sunday, December 11, 2011

Steering Quickener


Working out how to mount the 1.5:1 steering quickener.

Once I'd worked out the design I plasma cut it out of 3mm steel.

Here's the finished result. Fits perfectly and is very rigid.

Bolted in place with the steering quickener.

Should work great. Next up are the seat brackets.

Thursday, December 8, 2011

Seems like not much has happened on the cuda lately, not much blog worthy stuff anyway. But here's a few random pics from the last couple of weeks:

Mocking up the steering column, steering wheel, pedals, seats etc to work out the seat brackets and steering quickener.

Fabricated an alloy shroud for the fans, and just starting the wiring of the run stand.

Finished lower control arms. Reinforced, sway bar brackets added, powdercoated, with Firm Feel heavy duty greasable pins and nylon bushings.

Lots of fun to spin the shell around.

Tuesday, November 22, 2011

Made an exhaust/muffler system for the engine/cam break-in on the stand. You void the warranty on TTI headers if you run them on break-in (as the ceramic coating needs to heat cycle before being fully set, and the exhaust gets too hot during the break-in), so I blasted a pair of old log manifolds and used the old mufflers off my car.

Friday, November 11, 2011

Garage

I've tidied up my garage so I can finish the car there, Weta Workshop is currently too packed with orcs and robots to fit an old muscle car back in.

Here's a before photo of the garage during the tear down of the car.