Concept image of the Kuda with the fiberglass hood off. The hood will be secured via four Aerocatch fasteners, and I'll be putting two extra pins on the rear edge of the roof, in order to latch the hood as shown when it's removed from the front.
Aerocatch fasteners. Pretty cool little things, very well engineered.
Wednesday, September 28, 2011
Lower Control Arms
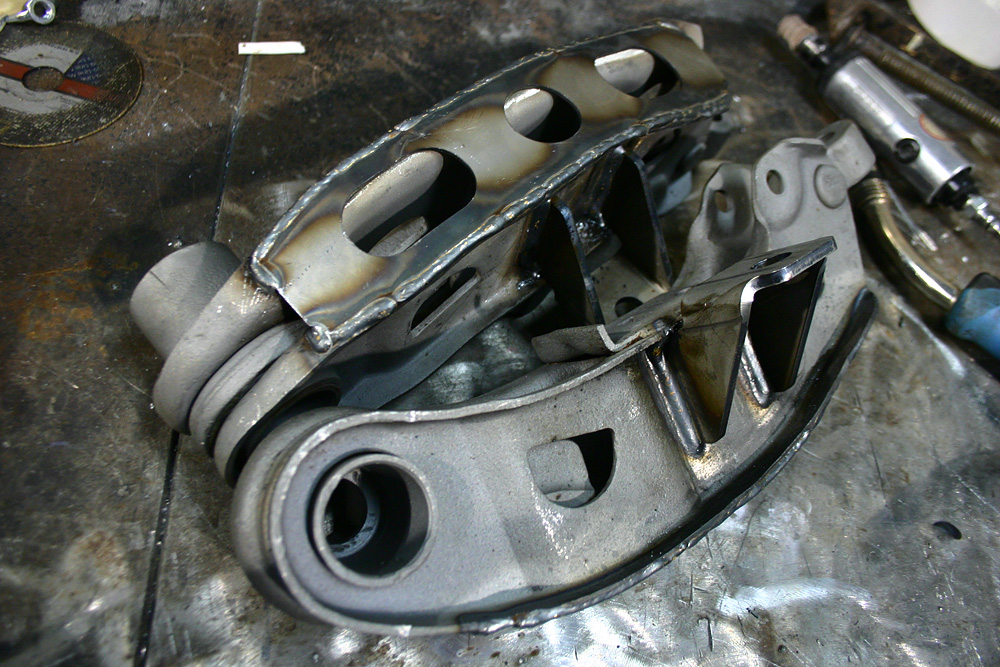
Reinforcing the lower control arms. First up they got stripped of bushings and bump stops, then sand blasted clean.
Reinforcing plates from Firm Feel were welded on the underside.
As my car never came with a front sway bar, I had to weld on the required brackets.
Done. Ready to be cleaned and powder coated.
Reinforcing plates from Firm Feel were welded on the underside.
As my car never came with a front sway bar, I had to weld on the required brackets.
Done. Ready to be cleaned and powder coated.
Sunday, September 25, 2011
Saturday, September 24, 2011
Thursday, September 22, 2011
Saturday, September 17, 2011
Installing the new Milodon road race oil pan, a very nice part.
Windage tray and pickup.
Reinforcing the factory K member. The skid plate will be welded in after I test fit the big tubular sway bar that has to fit under.
I welded all the seams (twice) and rewelded the factory welds (some of which were incredibly shabby, but that goes for the rest of the car too). I also added a Firm Feel gusseting kit.
It's always nice to weld new steel to clean metal. Welding the seam wasn't as nice due to all the oily crap between the metal which makes for shitty looking welds (the oily crap you can see here is just anti weld-spatter spray though, I sandblasted and ground the K member as clean as I could before I started welding).
Windage tray and pickup.
Reinforcing the factory K member. The skid plate will be welded in after I test fit the big tubular sway bar that has to fit under.
I welded all the seams (twice) and rewelded the factory welds (some of which were incredibly shabby, but that goes for the rest of the car too). I also added a Firm Feel gusseting kit.
It's always nice to weld new steel to clean metal. Welding the seam wasn't as nice due to all the oily crap between the metal which makes for shitty looking welds (the oily crap you can see here is just anti weld-spatter spray though, I sandblasted and ground the K member as clean as I could before I started welding).
Saturday, September 10, 2011
Rollbar work
I made a jig so I could work on the rollbar while the car is away from the workshop. Makes a tricky job a little easier, notching tubes can be tough on the brain! Especially if the joins are to be TIG welded, as then it's even more critical that the tubes fit tightly.
Once I had one of the backstays fitting right, I traced the scallops with paper and transferred the cut line onto the other backstay tube. Worked great, saved a lot of fiddly work. I've never done this stuff before so am pretty slow.
Once I had the backstays finished I mocked up the diagonal member in alloy. I made a rail on the jig that the tube could sit on so I could figure out the scalloping easier.
Once I had one of the backstays fitting right, I traced the scallops with paper and transferred the cut line onto the other backstay tube. Worked great, saved a lot of fiddly work. I've never done this stuff before so am pretty slow.
Once I had the backstays finished I mocked up the diagonal member in alloy. I made a rail on the jig that the tube could sit on so I could figure out the scalloping easier.
Monday, September 5, 2011
The car is a trailer again as space was needed in the Weta studio.
Some of the work done lately includes reinforcing the rear chassis rails as the inner face was pretty thin with age. I sandblasted then primed them.
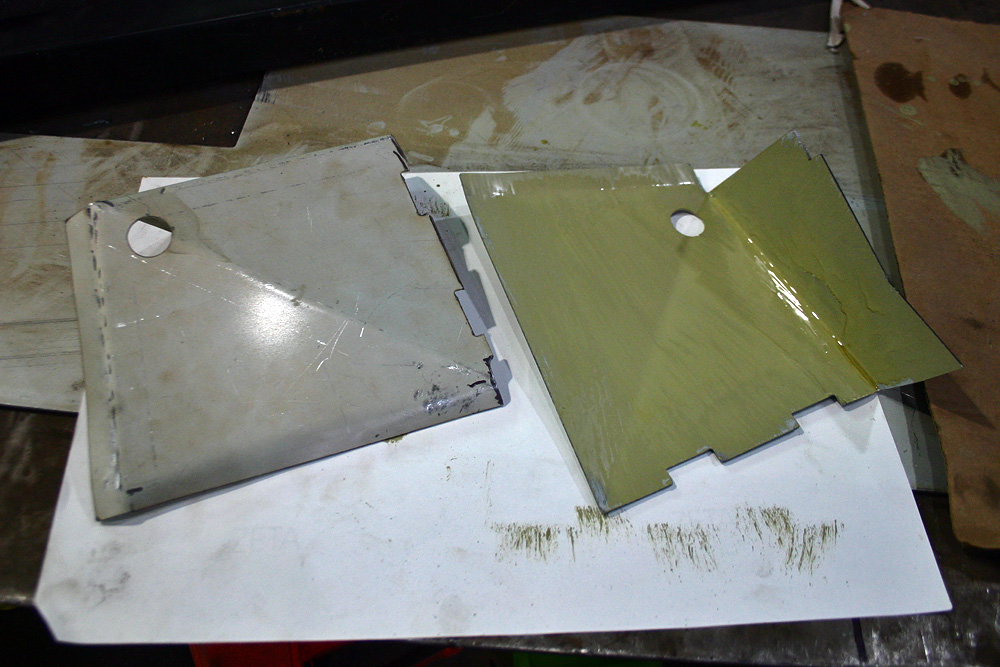
I cut plates out of 1.6mm steel and had a big swage put through the middle for rigidity.
Welded up, with the bottom edge ground smooth for a tidy look.
I also reworked the outer rear wheelhouses. My old tires used to rub in this area as the factory wheel houses curved excessively inwards.
Some of the work done lately includes reinforcing the rear chassis rails as the inner face was pretty thin with age. I sandblasted then primed them.
I cut plates out of 1.6mm steel and had a big swage put through the middle for rigidity.
Welded up, with the bottom edge ground smooth for a tidy look.
I also reworked the outer rear wheelhouses. My old tires used to rub in this area as the factory wheel houses curved excessively inwards.
Saturday, August 20, 2011
Some of the latest work on the underside. I've added torque boxes front and rear, added braces from the torsion-bar crossmember to the front chassis rails, and stitch welded the subframes and other key points.
Here's one of the rear torque boxes. I've also added a plate to the leaf spring hanger mount inside the box section formed by the torque box plate, same as the factory hemi cars got.
I fabricated the front torque boxes as they were much simpler than the rears.
Welded in place.
Also picked up the CNC bent rollbar hoop.
Here's one of the rear torque boxes. I've also added a plate to the leaf spring hanger mount inside the box section formed by the torque box plate, same as the factory hemi cars got.
I fabricated the front torque boxes as they were much simpler than the rears.
Welded in place.
Also picked up the CNC bent rollbar hoop.
Tuesday, August 16, 2011
Rollbar plan
Here's the plan for the rollbar. No more side intrusion bars due to them putting the rollbar in a more restrictive category with respect to MSNZ regulations.
Monday, August 8, 2011
Subframe Connectors
With the car on the rotisserie I could finish welding the underside of the floor to the subframe connectors. The torsion bar crossmember plate, note the gusseted torsion bar anchor, similar to what the 1970 Trans Am race cars had.
The other end of the bar, where it is slid into the rear chassis rail.
Sunday, July 31, 2011
BBQ fish
Made a rotisserie for working on the underside. It's not quite finished, this is a trial fit. Good fun spinning the car around, and it sure makes getting through the layers of shitty underseal on the bottom easier.
Saturday, July 23, 2011
Here's a little bit of the recent work. Around the door and window apertures I've added one or two plug welds between every factory spot weld.
Cut some templates to the inner roof skin shape and had some RHS bent up by Dydo manufacturing. These were for bracing the roof, and I had figured I'd tie the roll cage into these braces where they joined the sail panel structure. However I now plan to tie the main hoop to the sail panels via the upper seat belt mounts. That would make the horizontal brace unnecessary weight. And the roof is one of the worst places to add weight. So now I'm not sure I'll use these at all.
I milled them full of holes on one side to lighten them. I drilled the bottom of the horizontal piece thinking that I wanted the maximum surface area to glue to the roof skin with panel-bond epoxy. However after thinking about it I decided the upper surface was a better choice as there is still plenty of area for the roof skin to bond to it, and the weakening from the lightening holes would be offset by the roof skin. So I milled the holes into the top of the diagonal piece.
Here they are sitting in place, they fit up against the roof skin perfectly. If I did decide to use them I'd get another horizontal piece made up and drill the upper surface.
They were a good exercise, but they seem unnecessary now and I won't be adding them.
I've added a handbrake to get rid of the shit, factory, foot operated parking brake. Plus the subframe connectors get in the way of the factory underslung cables. Don't know if the parking brake mechanisms in the drums are up to handbrake slides, but it would be fun if they are.
Cut some templates to the inner roof skin shape and had some RHS bent up by Dydo manufacturing. These were for bracing the roof, and I had figured I'd tie the roll cage into these braces where they joined the sail panel structure. However I now plan to tie the main hoop to the sail panels via the upper seat belt mounts. That would make the horizontal brace unnecessary weight. And the roof is one of the worst places to add weight. So now I'm not sure I'll use these at all.
I milled them full of holes on one side to lighten them. I drilled the bottom of the horizontal piece thinking that I wanted the maximum surface area to glue to the roof skin with panel-bond epoxy. However after thinking about it I decided the upper surface was a better choice as there is still plenty of area for the roof skin to bond to it, and the weakening from the lightening holes would be offset by the roof skin. So I milled the holes into the top of the diagonal piece.
Here they are sitting in place, they fit up against the roof skin perfectly. If I did decide to use them I'd get another horizontal piece made up and drill the upper surface.
They were a good exercise, but they seem unnecessary now and I won't be adding them.
I've added a handbrake to get rid of the shit, factory, foot operated parking brake. Plus the subframe connectors get in the way of the factory underslung cables. Don't know if the parking brake mechanisms in the drums are up to handbrake slides, but it would be fun if they are.
Thursday, July 7, 2011
Saturday, July 2, 2011
Friday, July 1, 2011
Subscribe to:
Posts (Atom)